Lesson 1: SSH the Secure Shell Protocol
2023-03-30
802 words
4 mins read

This article describes the Secure Shell Protocol, otherwise known as SSH, and how to utilize the best practices with SSH.
Creating SSH Keys

The SSH protocol is used by computers to establish secure secure connections between 2 different points, in this case, your computer and a server.
To do this you need to first create something called SSH keys. This means you need access to the SSH command on the device your using to make the connection from such as Windows, Linux, or Mac.
Usually you will need to install SSH on Windows if this is your first time using ssh, but for Mac and Linux SSH protocol is usually already installed.
- To begin opening a Terminal session on your device:
In my example, I will be using Windows,
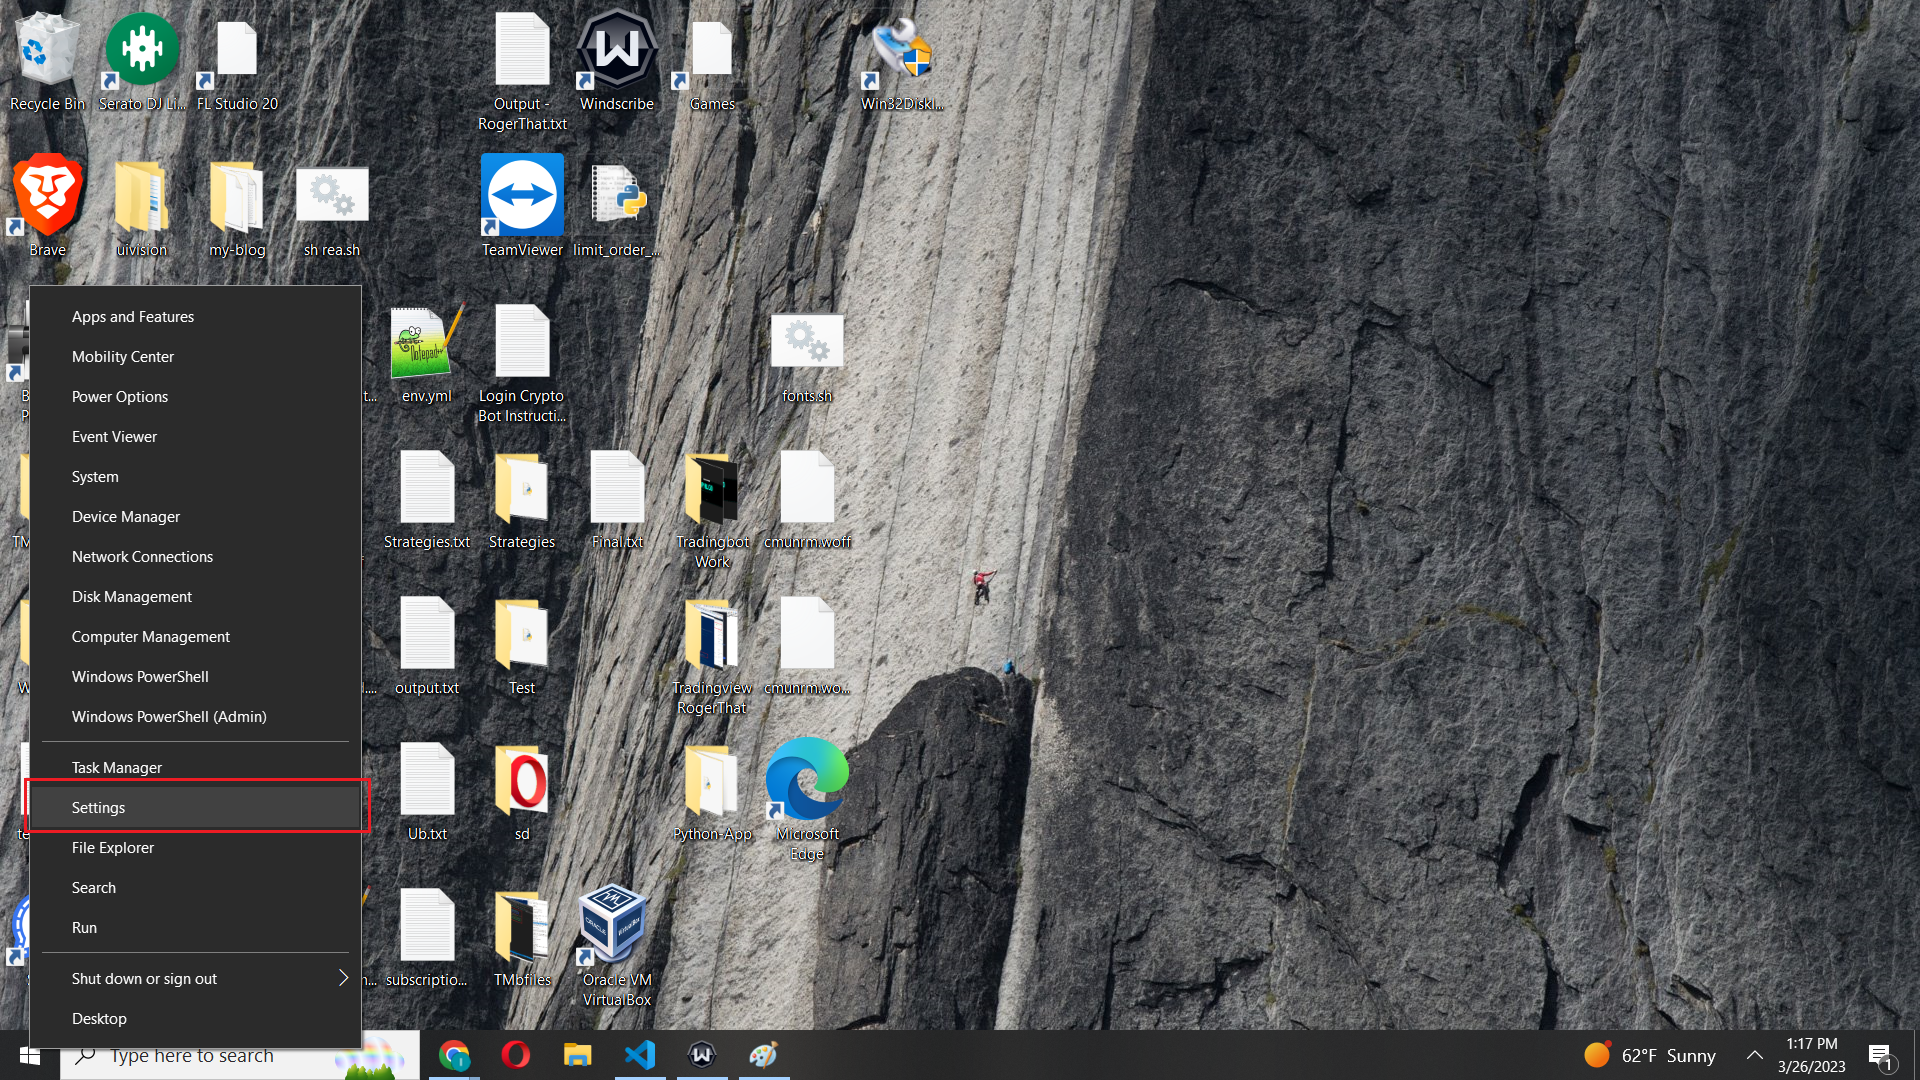
- Then issue this command to make sure ssh is installed and ready to use in your terminal:
sshYou should get a response like this indicating it’s ready to use:
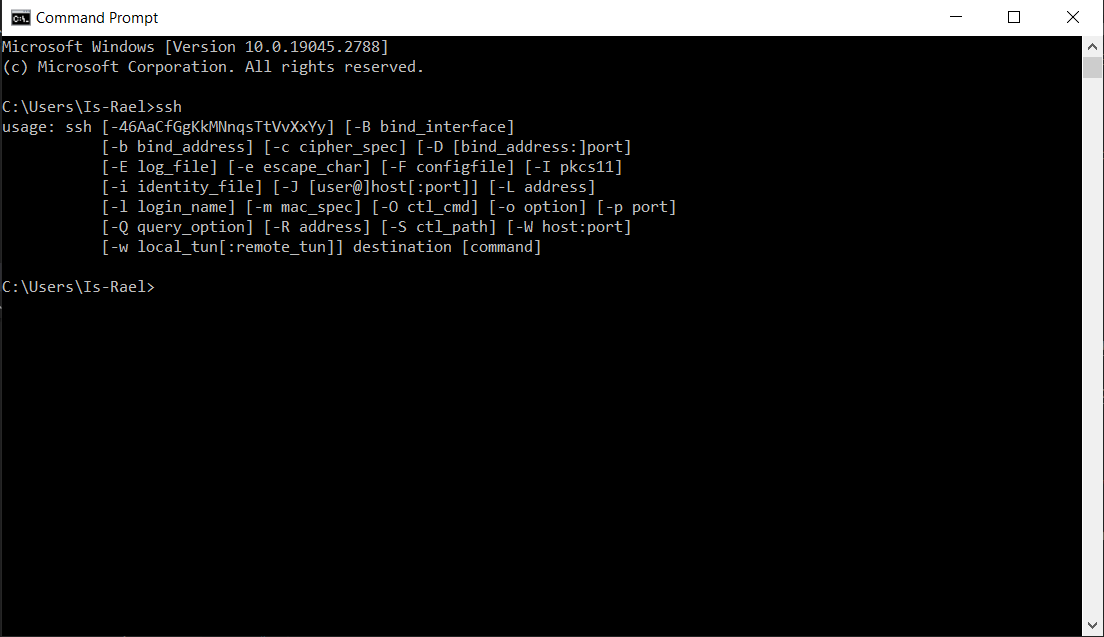
You can install SSH on Windows Command Prompt with this guide.
Now we will create SSH keys between our computer system and VPS.
Note: You can use different authentification methods with SSH such as:
• Password - Least secure • SSH Keys - Most Secure • SSH Keys & Password - Even more Secure
SSH keys replace passwords and are considered the best practice for establishing SSL connections securely. Think of SSH keys as large files that take the place of the password and are used to log in instead.
The only way someone can hack your SSH connection and log in to your server is if they steal your keys which is unlikely.
Additionally, you can attach a password to your SSH key which does increase security. The drawback of adding a password to the SSH key is you will have to enter a password every time you SSH into a server, which can be burdensome and limit your ability when creating automated scripting tasks that login to servers.
- To generate your keys run the next command inside your terminal and follow the prompt:
ssh-keygenWhatever user you are logged in as when you run this command the default location and file will be named “C:\Users\your-user/.ssh/id_rsa”, replacing “your_user” with your logged-in user.
You can choose a different path and file name if you want to choose something other than the default name and file location. Just make sure you specify the full location path and file name like so:
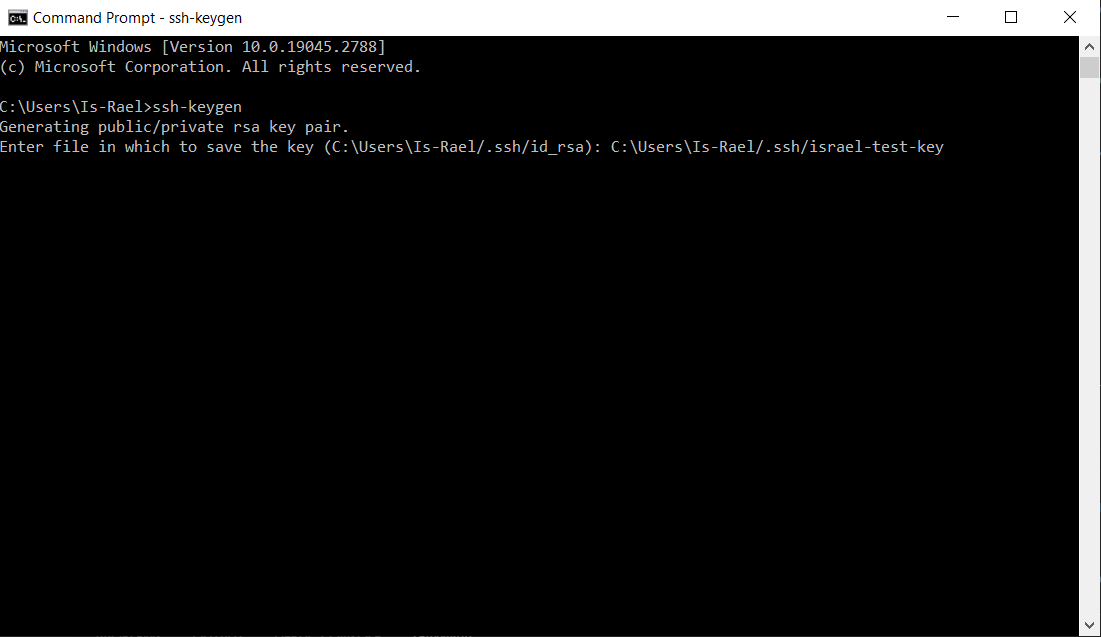
Note: A good practice is to name the user that will be logging in inside the file name of the generated ssh keys. For example my key is named “israel-test-key”.
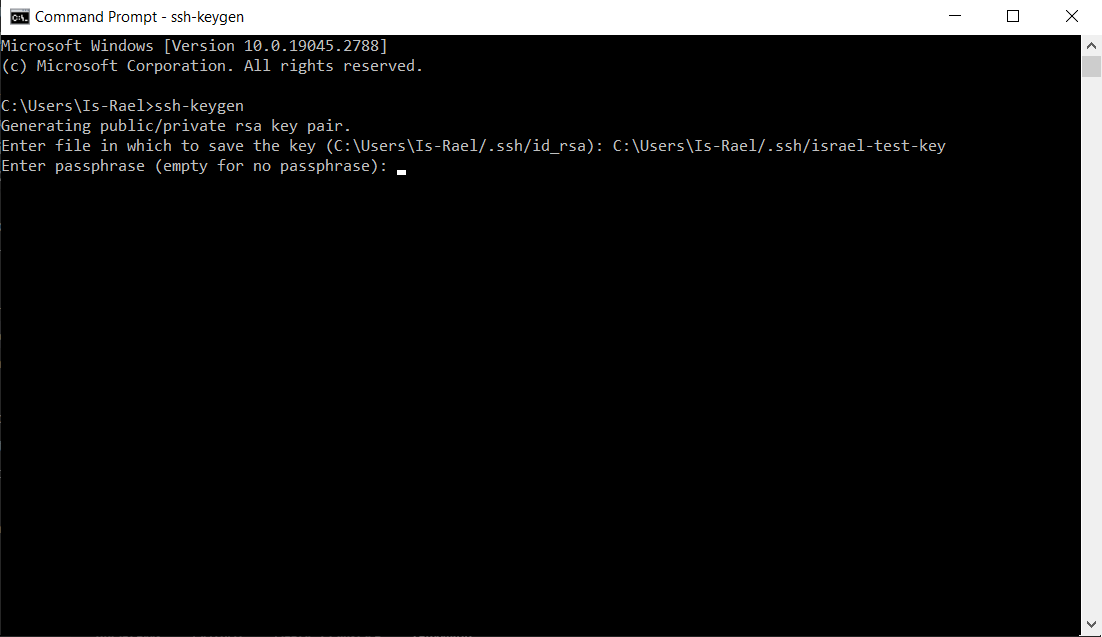
You will also be prompted to add a password which you can type to increase ssh keys security. Remember adding a password will require you to enter it every time you SSH into your server, to specify no password press “Enter” to continue with the prompt.
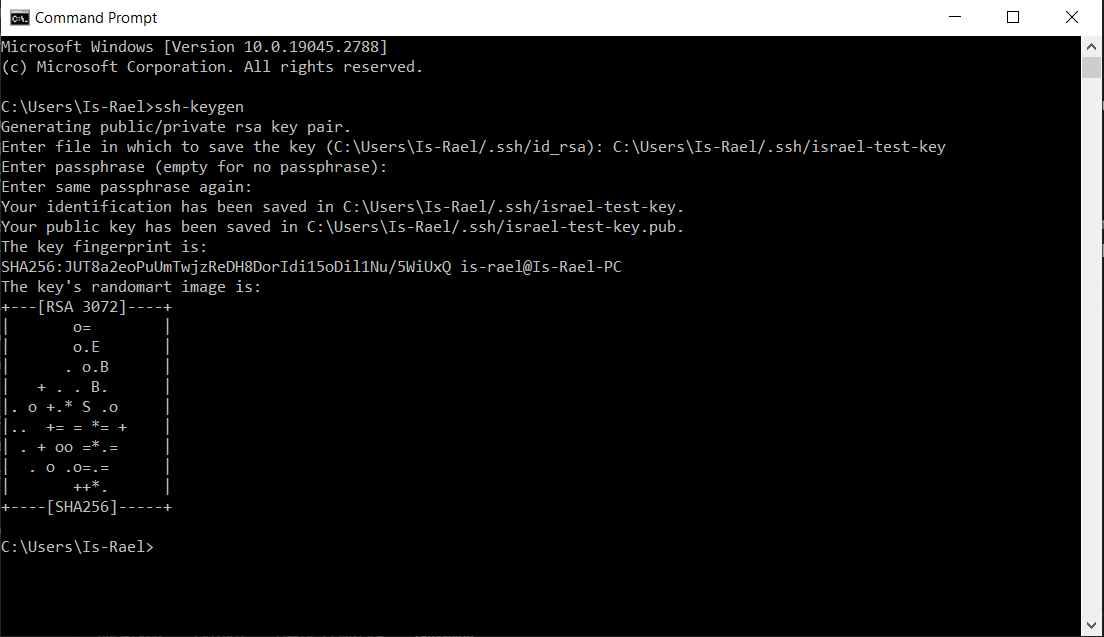
At this point, your keys will be generated and saved to your chosen file location after completing the prompt.
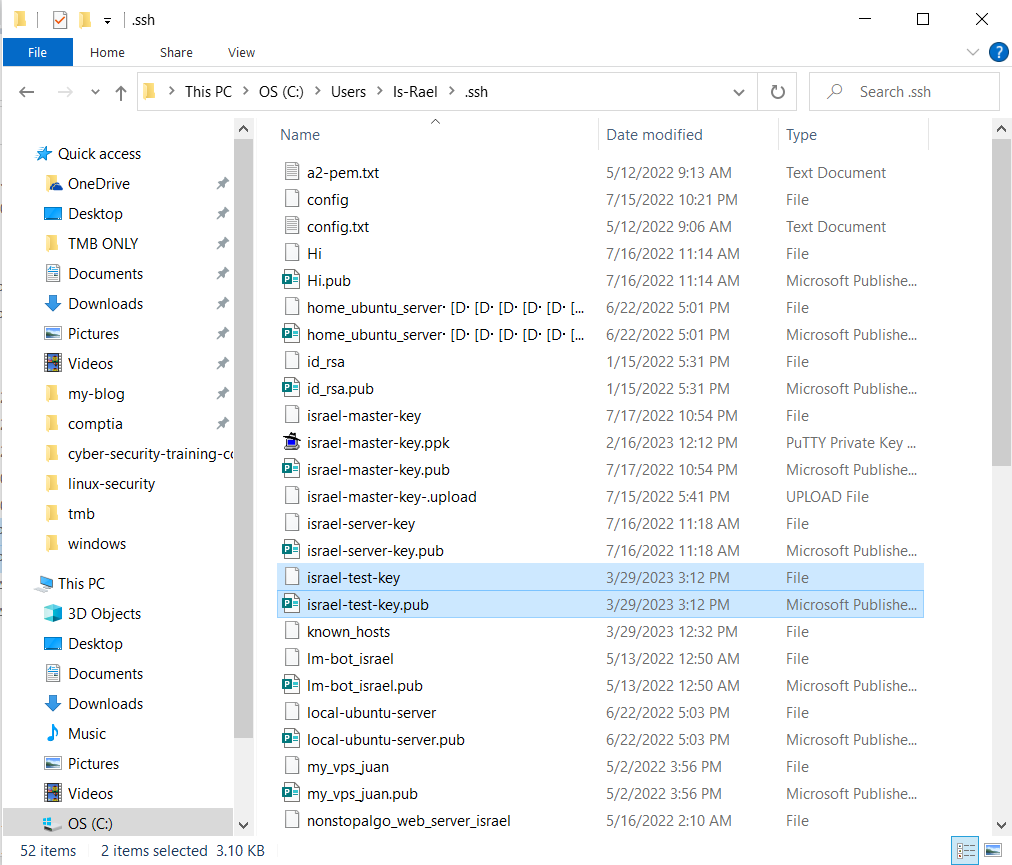
As long as you have a public and private key you are ready for the next step.
The private key will be kept secret and used to establish an SSH connection from the computer you are SSH from.
The public will be shared with the server we want to connect to and used to authenticate the private key.
Connecting to Server with SSH Keys
For this next part, you will need a Virtual Private Server (VPS) that will allow SSH connections. I recommend Ubuntu as this is what I will be using in this tutorial.
You will need to copy and paste your public key to the “~/.ssh/authorized_keys” file in the user account that you want to log in to on your Ubuntu VPS.
If the “authorized_keys” or the “~/.ssh/” directory does not exist, creat both and then and copy/paste your public SSH key onto the first line of the “authorized_keys” file.
mkdir ~/.ssh
nano ~/.ssh/authorized_keys
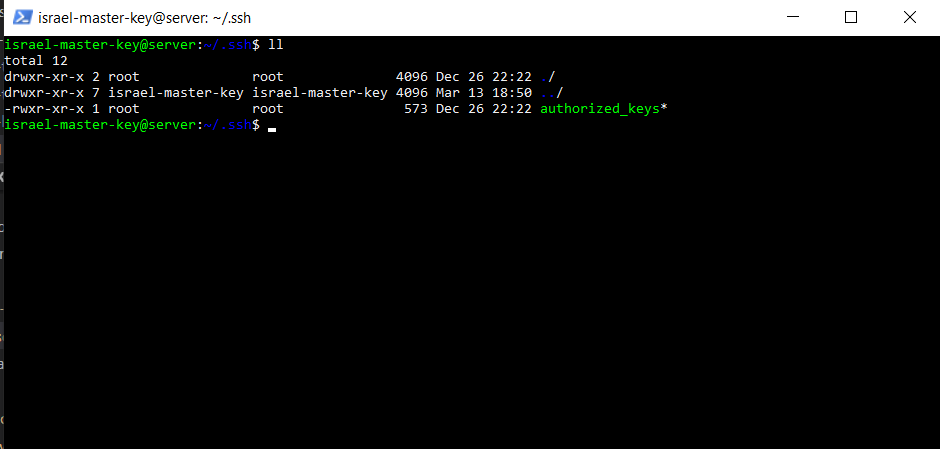

Once you have your Ubuntu VPS setup and your public key in your user’s “~/.ssh/authorized_keys” file on your VPS we are going to use SSH to log in to it from our client Windows computer.
Depending on the user you have on your Ubuntu VPS will determine the specific SSH command you will run to log in. For example, mine looks something like this.
ssh [email protected]You will replace the user with your appropriate user, followed by your VPS IP address.
When you first try to log in with the SSH key specifying your user you may get permissions denied because SSH is trying to use the default key “id_rsa” to login. We need to specify the correct keys using the
-i ssh -i "~/.ssh/israel-master-key" [email protected]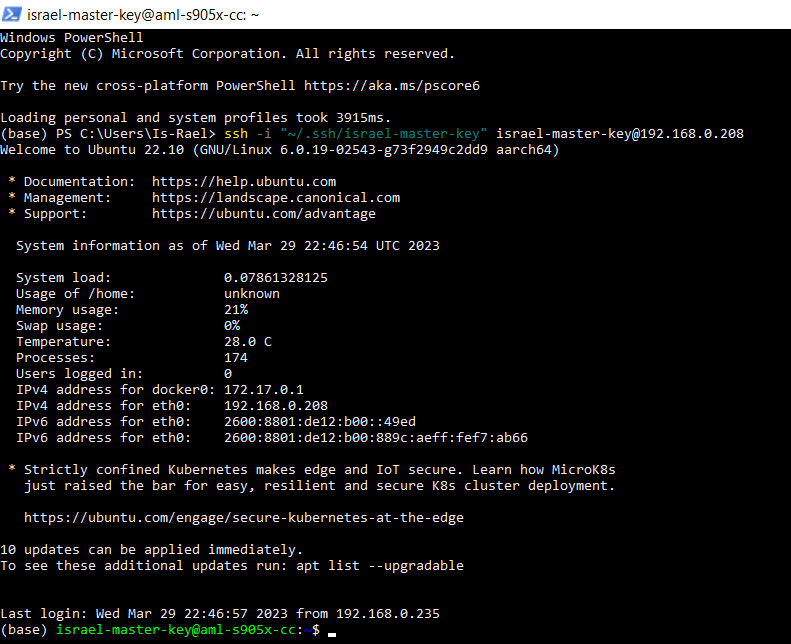
You should now be logged into your server.
Related Articles:
- 2023/03/30 What is Linux Security?
- 2023/03/29 How to Open Terminal on Linux?
- 2023/03/29 How to Open Terminal on Mac?
- 2023/03/29 How to Open Terminal on Windows?
- 2023/03/29 How to install SSH on Windows Terminal?
Authored By Is-Rael Landes
Is-Rael Landes, a good man living on the earth, loving making website, teaching others and coding.